Assistance

Welcome to Naim Support

Welcome to the Naim support pages. We believe that many of your questions can be answered using the resources below. Please use these in the first instance when looking to resolve any issues, failing that please contact your retailer for further support.

Our specialist retailers are trained to be able to assist if something is wrong with your product, if they aren’t able to resolve any issues they will be able to contact us on your behalf and arrange service or repair if needed.

If you aren’t having any luck with the process above please contact us using the details at the bottom of this page.

A question?

Frequently Asked Questions

  • Uniti

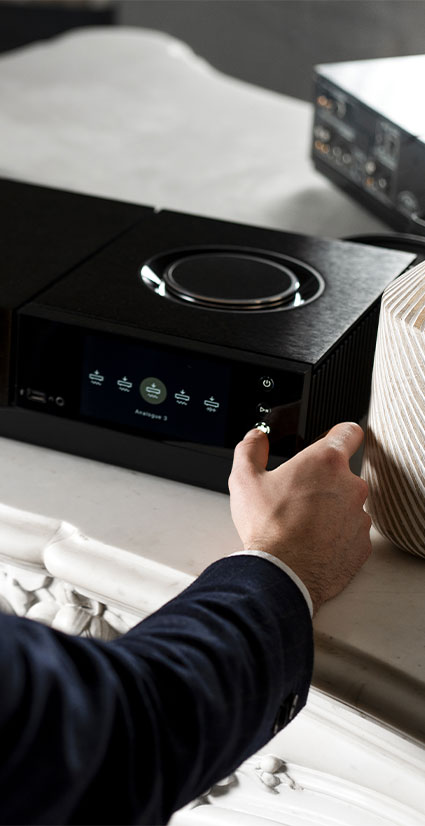
Introduction to your Uniti Nova

Uniti Nova is proof that an all-in-one player can deliver audiophile quality. Whichever source you choose, your music will be transformed into a stunning sonic experience. The reference player in the range, Uniti Nova has been configured to offer the very best solution that we can implement in a single-box, compact enclosure. All the available space has been used to provide 80 watts per channel of Class A/B amplification capable of driving the most demanding loudspeakers – detail and depth you’ll hear in every note, riff, and chorus.  Nova is twice the width of Atom to make room for a bigger power supply and the largest mains transformer in the Uniti range. What's in the box In your Uniti Nova you will find:  The Uniti Nova  Power Cable Remote Handset 4 x AAA Batteries Speaker Plugs Cleaning Cloth Document Pack Including the Quick Start Guide, Statutory Safety Manual and Registration/Warranty Card What you'll need  What else is required?  These pieces of equipment are required for you to use all the features of the Uniti Nova.  Internet connection - internet connection, router with WiFi capabilities or network cable for wired use.  Loudspeakers - with speaker cable.  Tablet or Smartphone - (iOS or Android only). 
  • Uniti

Getting to know your Nova

1. Volume dial — Adjusts the volume directly. 2. Power / Standby button — Used to turn the device on and enable different standby modes. 3. Play / Pause button — Used to play or pause the current track. 4. Input button — Select which input you would like to play from. 5. Favourites button — Use to access saved favourites. 6. Front panel display — Displays ‘Now Playing’ information and allows access to set-up menus, and music input via the Naim remote. 7. 3.5mm headphone port — Used to attach headphones. 8. Front USB type A — Used for connecting USB storage. 9. Power socket — Used to attach to mains power. 10. Loudspeaker connections — used to connect your loudspeakers . Custom Naim Audio loudspeaker connectors are supplied to make the connection. Naim Audio speaker cable will provide the best results, but a range of speaker cable types may be used without risk of damage to the amplifier. Use equal lengths of speaker cable for each channel. Ensure when connecting speakers that they are in phase (the positive and negative connection orientation at both speaker and amplifier ends of the cable is the same for both channels). 11. Memory card port — Used for inserting SD memory cards. 12. Network cable port — Used to attach to your network. 13. Back USB port — Used for connecting USB storage. 14. DAB/FM Radio — Used to pick up reception for DAB and FM radio stations. 15. HDMI ARC input (optional) — For connecting external audio-visual device via a HDMI ARC cable. 16. Digital Inputs — Two coaxial (RCA phono 1 & 2), one BNC (3) two optical inputs (TOS Link 4 & 5) 17. Analogue inputs (RCA) — 2 x RCA phono. 18. 5-pin DIN — 2 x 5-pin DIN inputs, used to connect various media devices. DIN offers better sound quality when connecting between Naim components. 19. Ground switch — Select the default position unless the product is connected in a hi-fi system (via an analogue audio connection that includes an earth connection) incorporating another earthed source component, or mains ‘hum’ is audible through the loudspeakers. 20. Analogue outputs (RCA) — Preamp/ Sub Output. 21. Analogue outputs (DIN) — Preamp Output. Getting to know your Remote 1. Power / Standby button — Puts Uniti Nova into Network Standby. 2. Favourites button — Scrolls through favourite internet radio stations which can be set-up using the Naim app. 3. Multiroom button — Reserved for future functionality — the Naim app should be used for multiroom functionality 4. Input selection — Brings up the input carousel on the front panel which allows the user to select the required input. 5. Clock button — Used to display the clock. 6. Options button — Shows additional information when available as indicated by the ’…’ on the front panel. 7. Brightness button — Toggles through four brightness settings for the illuminated buttons, volume ring and Naim logo. 8. Navigation buttons — Used to navigate around the front panel display. 9. OK button — Used to confirm selections. 10. Back button — Used to go back to the previous screen. 11. Home button — Shows the Home screen on the front panel. Press and hold (for 3 seconds) to pair the remote. 12. Now Playing button — Shows the ‘Now Playing’ screen for the input selected and times out to the album artwork view/less detailed view. 13. Skip back button — Used to skip back a track. 14. Play button — Used to play streamed media. 15. Skip Forward button — Used to skip forward a track. 16. Volume down button — Turns down the volume of playback. 17.Mute button — Mutes the playback. 18.Volume up button — Turns up the volume of playback.
  • Uniti

Setting up your Uniti Nova

Connecting the power supply Take great care when lifting, carrying and moving Uniti Nova to access the mains power at the rear of the unit.  Do not invert Uniti Nova so that its weight is borne by the top panel or front screen. Do no stand Uniti Nova on either end panel. Locate the power socket on the back of the Uniti Nova. Insert the power cable in to the socket and turn on the mains power. Press the power button, to switch the Uniti Nova on. Set up using a wired network connection Take great care when lifting, carrying and manipulating Uniti Nova to access the mains power, network and audio connections. Do not invert Uniti Nova so that its weight is borne by the front panel or volume control. Do no stand Uniti Nova on either end heatsinks. Ensure that the Uniti Nova is not plugged in to any mains power supply. Connect an Ethernet cable from your router to the Ethernet port on the back of the Uniti Nova. Connect the power cable to the Uniti Nova and switch the mains power on. The light ring around the volume control knob will pulse until the unit is set up and running. You will need to download the Naim app to operate the device. Set up using Wi-Fi connection Ensure that the Uniti Nova is not plugged in to any mains power supply. Connect the power cable to the Uniti Nova and switch the mains power on. Press the power button. The light ring around the volume control knob will pulse until the unit is set up and running. Touch the Naim app. Touch Set up new product. Touch Uniti Atom, Star & Nova. Touch NEXT. Touch Wireless. Touch the Uniti Nova. Confirm the details shown, then touch Next. Touch Done. Touch the desired country. Touch the desired product name. Touch the desired option. Touch Next. Touch the desired option. Touch Done. Your Uniti Nova is now set up and ready to use. Pairing the remote Once your unit is powered and on, you will need to pair the remote. 1. To pair your remote, ensure Uniti Nova is turned on. 2. Hold the remote close (within 5cm) to the Uniti Nova. Press and hold the Home button for 3 seconds. 3. The remote is now paired to the unit and ready to use. Signal Grounding Switch — Default or Floating? If you are using the Uniti Nova connected to a mains grounded CD Player, the Uniti Nova Grounding Switch should be set to Floating. No damage will be done if the wrong Signal Ground Position is chosen, however the system sound quality may be compromised.
  • Uniti

What are the different Power modes

On — The device is turned, connected and ready to use Network Standby Mode — To put the Uniti Nova into Standby, press the power button once on either the front panel or the remote. The Naim logo and all front panel lights except the power button will turn off. The Uniti Nova will continue to be detected in the app. To bring the Uniti Nova out of Network Standby Mode, press the power button on either the front panel or the remote. Deep Sleep — To put the Uniti Nova in to Deep Sleep Mode, press and hold the power button for 3 seconds on either the front panel or remote. The Naim logo and front panel buttons will turn off and the power button will dim. The Uniti Nova will not be detectable from the app or the remote. All functionality will be disabled when in Deep Sleep Mode. To bring the Uniti Nova out of Deep Sleep Mode. Press the power button.
  • Uniti

Streaming music through your New Uniti product

Browsing music How to browse your music within the Naim app.  To browse different artists across your music stores touch Artists. A list of artist will be displayed, touch the desired artist to view their albums. Touch the desired album. Touch the '...' icon next to a track to open the playback menu. From this menu you have the ability to play a track, ad a track to the payback queue or add to a playlist. To browse different albums across your music stores touch Albums.  Touch the desired album. Touch the Play icon to play the album. To see music sorted by Genre, New Imports, Composers or Conductors, touch the desired icon. To search for an artist, album, genre, composer or a conductor, touch the Search icon. Begin typing in your desired search. A lost of search results will be displayed, touch the desired search result.  Playing Audio via AirPlay  Ensure your Apple device is on the same network as Uniti Nova. Load a music playback app that is compatible with Airplay on your device. Click the AirPlay icon. Click Uniti Nova. Select a track you would like to play, the AirPlay icon will change to blue indicating that the music is being streamed to Uniti Nova. *With Airplay 2, you can multiroom to multiple devices at once, not limited to Naim* Playing Audio via Spotify Connect  Touch the Spotify app. While streaming a song, touch Devices Available. Touch the name of your Uniti Nova device. Once connected, the Uniti Nova will be show in green at the bottom of the screen. Alternatively, touch the Naim app. Touch Spotify. Touch Open Spotify app. Select the music you wish to listen to. Touch Devices Available. Touch Uniti Nova. Touch the Play icon. Your Uniti Nova will now stream the music from Spotify. Playing Audio via Chromecast Touch the Naim app. Touch Uniti Nova. Touch the Chromecast built-in icon. This will populate a list of apps that are Chromecast enabled. Touch the desired app to open the application. Touch Open. Touch Devices Available. Touch the … icon next to the Uniti Nova. Touch Google Cast. The track will begin to play via Chromecast.
  • Uniti

What formats does my Core support?

WAV - up to 32bits/384kHz FLAC and AIFF - up to 24bit/384kHz ALAC (Apple Lossless) - up to 24bit/384kHz MP3 - up to 48kHz, 320kbit (16 bit) AAC - up to 48kHz, 320kbit (16 bit) OGG and WMA - up to 48kHz (16 bit) DSD - 64 and 128Fs Notes: Gapless playback supported on all formats.
  • Uniti

How do I install a HDD or SSD into the Core?

At the back of the Core you will see a removable caddy tray: you can use a small cross-headed screwdriver to remove the two screws on the caddy. Slide the caddy out and place your chosen HDD on the caddy, carefully turn it over and insert the provided HDD/SSD screws into the marked holes for your HDD/SSD to secure it in place making sure the SATA connection for the drive is mounted towards the internal connections of the Core. Slide the caddy back into the Core and replace the screws on the caddy tray.
  • Uniti

What kind of SSD/HDD can I use in the core?

We suggest the Samsung 850 EVO SSD series drives or the Seagate Pipeline, as we feel they sound and perform the best as of the time the Core has been released. SSD drives will offer better performance and longevity generally speaking compared to cheaper HDD drives as they have no moving parts. 
  • Uniti

What size SSD/HDD do I need, and is there a limit?

A typical music CD carries around 600 Megabytes (MB) of data, there is 1000MB to every Gigabyte (GB) and 1000GB to every Terabyte (TB). For example if you have a CD collection of 100 CDs you will need around 60,000MB of space or 60GB. 200CD’s I will need a storage drive of 120GB. For a music listener with around 400 CDs a storage size of 512GB will be more than adequate to accommodate their music library. The maximum size limit of a Core HDD or SSD is 8TB.
  • Uniti

How do I setup my Core’s internal/external/NAS drive for ripping?

Music Stores must be configured before you can rip CD’s or import music to your SSD/HDD/NAS storage. This means selecting the storage you wish to use as a store for your Music you will be ripping/importing. It will then format the drive which will erase all data currently on it - if any - and will be used as a Naim music store. To do this use the Naim App, go to settings manage music configure music stores configure new music store.  It will now ask you to choose the disc to use as a music store, select the HDD/SSD you have installed under ‘LOCAL DRIVES’ internal SATA. If you have a NAS drive you wish to use, it should appear under ‘NETWORK DRIVES'. It will now ask you to prepare the drive, and choose the audio file format. We suggest FLAC format as it allows for easier handling of metadata and album artwork (due to it being packaged up in the FLAC file itself) and takes up less space than WAV. It will now show your music store is ready. 
  • Uniti

How do I rip a CD?

Insert the CD you wish to rip to your music store. It will now begin ripping the CD you have inserted, and you will see the ‘Ripping Monitor’ icon appear in the top left of your Naim App screen. To check the progress of you CD rip please use the small ‘ripping monitor’ icon. The music you have ripped will appear in the ‘Albums’ section of the App, and can now be played and added to playlists etc. Once the CD has ripped it will automatically eject, to manually eject the CD use the eject button on the front of the Core if needed.
  • Uniti

How do I backup my Core to an external drive?

A backup of a device means to have all the information and settings saved in another device for safe keeping. So for example when you backup your computer onto an external HDD of some kind – so that in the event of a HDD or SSD failing you still have your data saved elsewhere, so you can get it back and restore it to your Core. To make a backup of your Core please firstly insert into the rear USB port a HDD or SSD appropriate to your HDD or SSD you have installed in the UnitiCore (for example if you have installed a 500 GB HDD you will need a 500GB HDD to backup to).  Go into:  Settings  Manage Music  Backup Music.  There are 4 options here, if this is the first time you are backing up then please use the ‘Configure a new backup’ option. It will now display all the drives it can see, ‘LOCAL DRIVES’ refers to your drive connected via USB front panel. Now select the USB drive you have inserted from this list – it will ask you to prepare the drive and inform you that it will be formatted before continuing – select ‘yes’, and choose from NTFS (for Windows PC) or HFS+ (for MAC OS PC). It will now warn you that it will erase the drive during the formatting process - Make sure the drive you are using has no information on it otherwise you will lose it.  Once you have selected a format type it will format the drive ready for backup. Now choose ‘Backup Now’, and the backup process will begin.

product documentation

useful links

register a product find a retailer Warranty policy
Extended warranty Export warranty Mu-so warranty

Other resources


NETWORK TROUBLESHOOTING

A guide to troubleshooting any network issues you may be experiencing with your Naim Product.


WHITE PAPERS

In-depth explanations of Naim technologies and innovations across our entire range.


SERIAL NUMBERS

Check your product serial number to find out its date of manufacture.


PRODUCT UPDATES

Find and download the latest software to ensure you are making the most of your Naim product.


PRODUCT HISTORY

A complete timeline of Naim product launches, stretching back to our foundation in 1973.


UPGRADE PATH

Find the path to upgrade your system and improve musical performance.


after-sales service

If you have a problem with one of our products, we invite you to contact our customer service department using our contact form.

Tips

If you would like advice on our products before making a purchase, or if you have any questions on how to use them, please do not hesitate to contact us via our contact form.

You can also contact us directly by e-mail at [email protected] or by phone: 01722443405

JOIN THE COMMUNITY

Receive a sneak preview of the latest audio innovations from Focal and Naim by subscribing to our exclusive newsletters. Be among the first to discover our new products, and receive privileged information straight to your inbox.